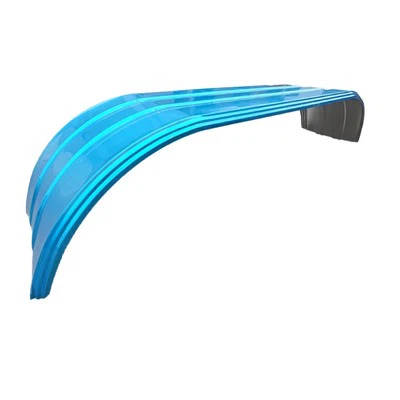
Hey there! As a supplier of steel trailer mudguards, I'm stoked to share with you a step-by-step guide on how to install these bad boys. Whether you're a seasoned DIYer or a newbie looking to spruce up your trailer, this guide will have you covered.
Why Choose Steel Trailer Mudguards?
Before we dive into the installation process, let's talk about why steel trailer mudguards are a great choice. Steel is known for its durability and strength, making it perfect for withstanding the rigors of the road. It can handle constant exposure to dirt, rocks, and other debris without getting easily damaged. Plus, steel mudguards have a sleek and rugged look that adds a touch of style to your trailer.
If you're in the market for high-quality steel trailer mudguards, check out our Steel Trailer Fender collection. We offer a wide range of options to suit your specific needs and preferences.
Tools and Materials You'll Need
To install a steel trailer mudguard, you'll need the following tools and materials:
- Socket wrench set
- Drill with appropriate drill bits
- Measuring tape
- Marker or chalk
- Safety glasses
- Gloves
- Steel trailer mudguard
- Mounting brackets
- Bolts and nuts
- Washers
Step 1: Prepare Your Trailer
The first step is to prepare your trailer for the mudguard installation. Start by cleaning the area where the mudguard will be installed. Remove any dirt, grime, or rust using a wire brush or sandpaper. This will ensure a clean and smooth surface for the mounting brackets.
Next, measure the area where the mudguard will be placed. Use a measuring tape to determine the correct position and alignment. Mark the spots where the mounting holes will be drilled using a marker or chalk. Make sure the marks are straight and evenly spaced.
Step 2: Install the Mounting Brackets
Once you have marked the mounting holes, it's time to install the mounting brackets. Place the brackets on the trailer frame and align them with the marked spots. Use a drill to create holes in the frame according to the bracket's holes. Make sure the holes are the correct size for the bolts.
Insert the bolts through the holes in the brackets and the trailer frame. Add washers on both sides of the frame and tighten the nuts using a socket wrench. Make sure the brackets are securely attached to the frame.
Step 3: Attach the Mudguard to the Brackets
Now that the mounting brackets are in place, it's time to attach the steel trailer mudguard. Lift the mudguard and align it with the brackets. Insert the bolts through the holes in the mudguard and the brackets. Add washers on both sides and tighten the nuts using a socket wrench.
Make sure the mudguard is level and properly aligned. Check for any gaps or unevenness between the mudguard and the trailer frame. If necessary, adjust the position of the mudguard and tighten the bolts again.
Step 4: Check for Proper Installation
After attaching the mudguard, it's important to check for proper installation. Give the mudguard a gentle shake to make sure it's securely attached. Check the bolts and nuts to ensure they are tightened properly. Look for any signs of damage or loose parts.
If you notice any issues, such as a loose mudguard or a damaged bracket, make the necessary adjustments or repairs. It's better to address these issues before hitting the road to avoid any potential problems.
Step 5: Repeat the Process for the Other Side
If you're installing mudguards on both sides of the trailer, repeat the above steps for the other side. Make sure to follow the same measurements and alignment to ensure a consistent look.
Tips and Tricks
- Use a level: When installing the mudguard, use a level to ensure it's perfectly horizontal. This will give your trailer a professional and polished look.
- Apply anti-rust coating: To protect your steel trailer mudguard from rust and corrosion, consider applying an anti-rust coating. This will extend the lifespan of the mudguard and keep it looking great for years to come.
- Follow the manufacturer's instructions: Different mudguards may have specific installation instructions. Make sure to read and follow the manufacturer's guidelines to ensure a proper and safe installation.
Other Mudguard Options
In addition to steel trailer mudguards, we also offer Heavy Duty 3-Axle Straight Fender Mudguard and Aluminum Semi Trailer Mudguard. These options provide different benefits and styles, so you can choose the one that best suits your needs.
Conclusion
Installing a steel trailer mudguard is a relatively simple process that can be done with basic tools and a little bit of know-how. By following the steps outlined in this guide, you can give your trailer a stylish and functional upgrade.
If you have any questions or need further assistance with your mudguard installation, feel free to reach out to us. We're here to help you find the perfect mudguard for your trailer and ensure a smooth installation process.
Ready to upgrade your trailer with a high-quality steel trailer mudguard? Contact us today to discuss your options and get started on your purchase. We look forward to working with you!


References
- General knowledge of trailer mudguard installation
- Manufacturer's instructions for steel trailer mudguards