Hey there, fellow trailer enthusiasts! I'm a supplier of trailer fenders, and today I'm gonna walk you through the process of replacing the mounting brackets of a trailer fender. Whether you're a seasoned DIYer or just looking to save some bucks on maintenance, this guide is for you.
Why Replace Mounting Brackets?
First off, you might be wondering why you'd even need to replace the mounting brackets. Well, over time, these brackets can take a beating. They're exposed to the elements, road debris, and constant vibrations. Rust, corrosion, and physical damage can weaken them, and if they're not in good shape, your fender won't be properly secured. That can lead to all sorts of problems, like the fender rattling loose or even falling off while you're on the road. So, it's definitely worth taking the time to replace them when needed.
Tools and Materials You'll Need
Before we get started, let's talk about what you'll need. Here's a list of tools and materials:


- Socket wrench set
- Screwdriver (both flathead and Phillips)
- Pliers
- New mounting brackets (make sure they're compatible with your trailer fender)
- Safety glasses
- Gloves
- Anti-seize compound
- Welding equipment (if your brackets are welded on)
Step 1: Safety First
Safety should always be your top priority. Put on your safety glasses and gloves to protect yourself from any sharp edges or flying debris. If you're working under the trailer, make sure it's properly supported on jack stands to prevent it from falling.
Step 2: Remove the Old Fender
The first thing you'll need to do is remove the old fender. Start by locating the bolts or screws that are holding the fender in place. Use your socket wrench or screwdriver to loosen and remove them. Depending on the type of fender and mounting system, there may be multiple bolts or screws. Keep track of them all so you don't lose any.
Once the bolts are removed, carefully lift the fender off the trailer. It might be a bit heavy, so enlist a friend to help if needed. Set the fender aside in a safe place.
Step 3: Remove the Old Mounting Brackets
Now that the fender is off, you can focus on removing the old mounting brackets. If the brackets are bolted on, use your socket wrench to remove the bolts. If they're welded on, you'll need to use a welding torch to cut the welds. Be careful when using the welding equipment, and make sure you're in a well-ventilated area.
Once the brackets are removed, inspect them closely. Look for signs of damage, rust, or wear. If they're in really bad shape, it's definitely time to replace them.
Step 4: Clean the Mounting Area
Before installing the new brackets, you need to clean the mounting area on the trailer. Use a wire brush or sandpaper to remove any rust, dirt, or debris. This will ensure a good, clean surface for the new brackets to attach to.
Step 5: Install the New Mounting Brackets
Now it's time to install the new mounting brackets. Start by positioning the brackets in the correct location on the trailer. Make sure they're aligned properly and that the holes match up with the holes on the trailer.
If the brackets are bolted on, insert the bolts through the holes and tighten them with your socket wrench. Use an anti-seize compound on the bolts to prevent them from rusting and seizing up in the future.
If the brackets are welded on, use your welding equipment to weld them securely to the trailer. Make sure the welds are strong and even.
Step 6: Reinstall the Fender
Once the new mounting brackets are in place, it's time to reinstall the fender. Carefully lift the fender back onto the trailer and align it with the brackets. Insert the bolts or screws through the holes in the fender and the brackets, and tighten them with your socket wrench or screwdriver.
Step 7: Check for Proper Fit and Function
After the fender is reinstalled, give it a good shake to make sure it's securely attached. Check that it's level and that there's no excessive movement. If everything looks good, you're almost done.
Step 8: Final Checks
Before hitting the road, do a final check of the fender and mounting brackets. Make sure all the bolts are tightened properly and that there are no loose parts. Take a quick test drive around the block to make sure the fender stays in place and doesn't cause any problems.
Our Trailer Fender Offerings
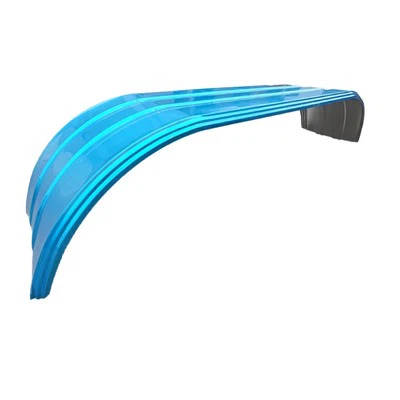
As a trailer fender supplier, we offer a wide range of high-quality fenders to meet your needs. Check out our Heavy Duty Curved Triple Axle Trailer Fender, which is built to withstand the toughest conditions. We also have the Aluminum Semi Trailer Mudguard, which is lightweight and corrosion-resistant. And if you're looking for a more budget-friendly option, our Trailer Aluminum Fender is a great choice.
Contact Us for Purchase
If you're interested in purchasing trailer fenders or need more information about our products, don't hesitate to reach out. We're here to help you find the perfect fenders for your trailer. Whether you're a small business owner or an individual trailer user, we've got you covered.
References
- Trailer Maintenance Handbook
- DIY Trailer Repair Guides
So, there you have it! Replacing the mounting brackets of a trailer fender isn't too difficult if you follow these steps. With a little bit of time and effort, you can keep your trailer in top shape and ensure a safe and smooth ride. Happy trails!